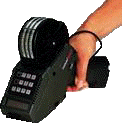
Caution: The connection to the speaker may become disconnected if the printer was dropped or hit hard. Contact technical support for more information.
Firmware version 1.5 of the 6032 uses the backspace key just like Scout 6020 and 6021 printers which erases characters. Reflashing the printer to version 1.5 or higher will update the printer.
6030, 6035 and 6037 Printers FAQs
| ||||||||||||||||||||||||||||||||||||||||||||||||||||||||||||||||||||||||||||||||||||||||||||||||||||||||||||||||||||||||
| For models 6030 and 6035: Make sure the ring around the communications port on the printer is not pressed in. Make sure the pins in the cable are no bent. | |
| For model 6037: Make sure that the cable is pressed all the way in. If connected
correctly, the cable will click into place. | |
| Make sure all parameters on the Host and Printer's Serial port match exactly. There is no one specific setting that works for everyone. Make sure that you're using the settings given to operate on your system configuration. |
![]()

Key in the number of a format in the printer's memory and press the enter key to retrieve it. If you are not sure what format numbers are available, start at number one and work your way through until you find the format you need. Some printers have multiple formats.
Verify the printer is properly loaded and calibrated for the label stock. Refer to the Operators Handbook for proper loading/calibration procedures.
| Verify the label stock is loaded correctly. The paper must be over the metal peel bar. | |
| Make sure the black mark sensor is not gummed up or covered by a label. | |
| If cleaning is needed remove the sensor and clean with cotton swab and isopropyl alcohol. | |
| Verify the black mark sensor is not dislodged from its position, the sensor must be seated firmly in its holder. |
The printer must have a complete date as shown: 06-20-2005 (20th june 2006).
| Make sure that the supply is not bound up in the supply holder. | |
| The supply roll should unwind easily. | |
| Check the Supply loading section of the Operator's Handbook for additional information. |
| Press the shift key and then the / or #3. This will make the screen have a double line as shown: --. | |
| At the - - prompt, key in the number that corresponds to the letter or symbol you wish to enter. | |
| When finished, press the shift key followed by the / or #3 to return to numeric
characters. | |
| Refer to the User's Manual for more information. |
Make sure the platen / feed roller module is latched and locked in place.
Note that both release buttons are fully forward through their slots. The feed roller is fully latched into place to allow the print head to transfer heat evenly across the labels.
![]()

| Verify supply type selected matches the supplies installed in the printer | |
| Make sure supply roll is secure . | |
| Verify print head pressure adjustment is correct- wide/narrow setting should match supply width detailed in the Operator's Handbook. | |
| Supply should be running against the inside edge of the supply path. |
| Ribbon must be seated all the way against the inside edge of the printer. | |
| Verify the ribbon material is positioned all the way into the ribbon sensor. | |
| After loading, turn take up knob several times to advance ribbon to eliminate any folds and to provide even tension across the width of the ribbon. |
| M9400 is the operator password. | |
| MANAGER is the universal password for port settings, printer configuration and format entry. | |
| Contact Technical Support if M9400 or MANAGER does not allow access to password protected menus. |
![]()
Check to insure you have a fully charged power source.
If you have a fully charged power source the unit has lost its application and will need to be re-flashed or sent in for service.
Communication values are mismatched between the host and the printer serial ports. All parameters on the Host and Printer's Serial ports must match exactly.
Refer to the User's Manual for more information.
![]()

| Turn off the printer. Verify the supplies are loaded correctly. | |
| Verify you have the correct supplies loaded in the printer. This printer has a center justified die cut and black mark sensor. If the labels you are using have a black mark on the edge and not in the middle, they will not work. | |
| Verify the proper supply type is selected in your setup menu. Refer to the Operator's Handbook for additional information. |
The password required to enter the menu system is as follows (1-1-1-3-1), the left button = 1, the middle button = 2, and the right button = 3.
Refer to the Operator's Handbook for additional information.
| Make sure the lever latches are closed completely and labels are loaded
correctly. | |
| Check your printhead and/or platen roller to make sure they are free from obstruction and
debris. | |
| Clean the printhead and/or platen roller using a cleaning pen or a cotton swab and isopropyl alcohol. |
| The communication values may be mismatched between the host and the printer's serial port. Make sure all parameters on match exactly. | |
| Make sure you are sending valid data to the printer. | |
| For MPCL versions of the printer (printer version is shown on the display when turned on), invalid or non printer language is being sent. Also, check for a faulty or disconnected communications cable and/or check for host related issues that we cannot determine. |
This is typical with an AS/400 system. The following parameters are suggested when setting up your outqueue:
Host print transform- *yesOther configurations can be suggested, contact technical support: 1-800-543-6650.
Mfr type and model- *wscst
Wrksta custom object- qwpdefault
Framing Error. The baud rate values may be mismatched between the host and the printer serial port. Make sure all parameters on the Host and the Printer's Serial port match exactly.
The printer has referenced a request that does not exist, referred to as "Noise on the Line". Electrical interference (Radios, Access Points, Heaters, Air Conditioners, etc.) could be picked up by the cable and random data bits may be received by the printer. Move the printer away from the interference.
Install the Radio Configuration Utility from the CD that was shipped with the printer or download it here:
Monarch® 9460IP™ Radio Configuration Utility (Version 1.0)
![]()

Verify you are using the proper supplies for this printer.
Verify the front door is closed completely on both sides.
If using the 6015, verify that you have fully charged rechargeable batteries in the unit.
If using the 6017, verify that you have a fully charged battery or that it is plugged into a known good outlet.
Verify the communication values are set as follows:
| baud = 19200 | |
| stop bits = 2 | |
| data bits = 8 | |
| parity = none | |
| flow control = rts/cts. |
Verify the communication values are set as follows:
| baud = 19200 | |
| stop bits = 1 | |
| data bits = 8 | |
| parity = none | |
| flow control = rts/cts. |
Create a custom application on the PDA platform (E.g. Palm OS, Pocket PC, etc.) that opens the printer serial port and sends it data to print, or use a third party application (like ones from www.stevenscreek.com).
Any Palm™ III Series will fit. This includes Palm III, IIIC, Symbol® SPT1500/1550, various HandEra™ units, etc.
Symbol® SPT 1700 Series, SPT 1800 Series, PPT 2700 Series, PPT 2800 Series. Other Symbol models may fit with custom adapters or changes to the mount. Please contact our Product Line Marketing Manager for information on custom fitting your PDA to the 6017.
|
Codes barres - barcoding - barcodes- EAN - étiquettes - labels -
étiqueteuses - labellers - imprimantes - printers - datacollection - data
collection - code barres - card printers - Etiketten - Cards
Pour toute question ou remarque concernant ce
site Web, envoyez un e-mail à :
|